- Open your app store on your device.
- Search Microsoft Lens and install the app.

- Once the app is installed, click to open it.
- Swipe through the quick tutorial.
- You’ll have to allow Lens to access your camera.


- Make sure you have the appropriate file type selected at the bottom of the app. You can choose Whiteboard, Document, Business Card, or Photo.

- Line up the orange square on the app over your document. If you can’t get the document to fill the orange square, lift your device up higher over the document, then move it back down.
- When ready, click the white capture button.

- To add another page to this document, click the white button with a camera and plus sign.

- Repeat steps 6 and 7.

- When you are done, click Done.

- In the top line, make sure you have signed into and selected the correct account to save this file to. Your CVTC OneDrive account is recommended. As you can see, I am connected to my CVTC OneDrive account because it says kanderson183@cvtc.edu. If you are not connected to your CVTC OneDrive account yet in the app, it will allow you to click Add Account when you click on the first line. Then sign in with your CVTC email address (username@student.cvtc.edu) and your Commons password.
- Rename your file in the Title field.
- Choose PDF.

- Chose OneDrive.

- Your file will say Transferring. The bigger your file, the longer it will take to transfer. Once it is done, you will be able to click on your file to view it.


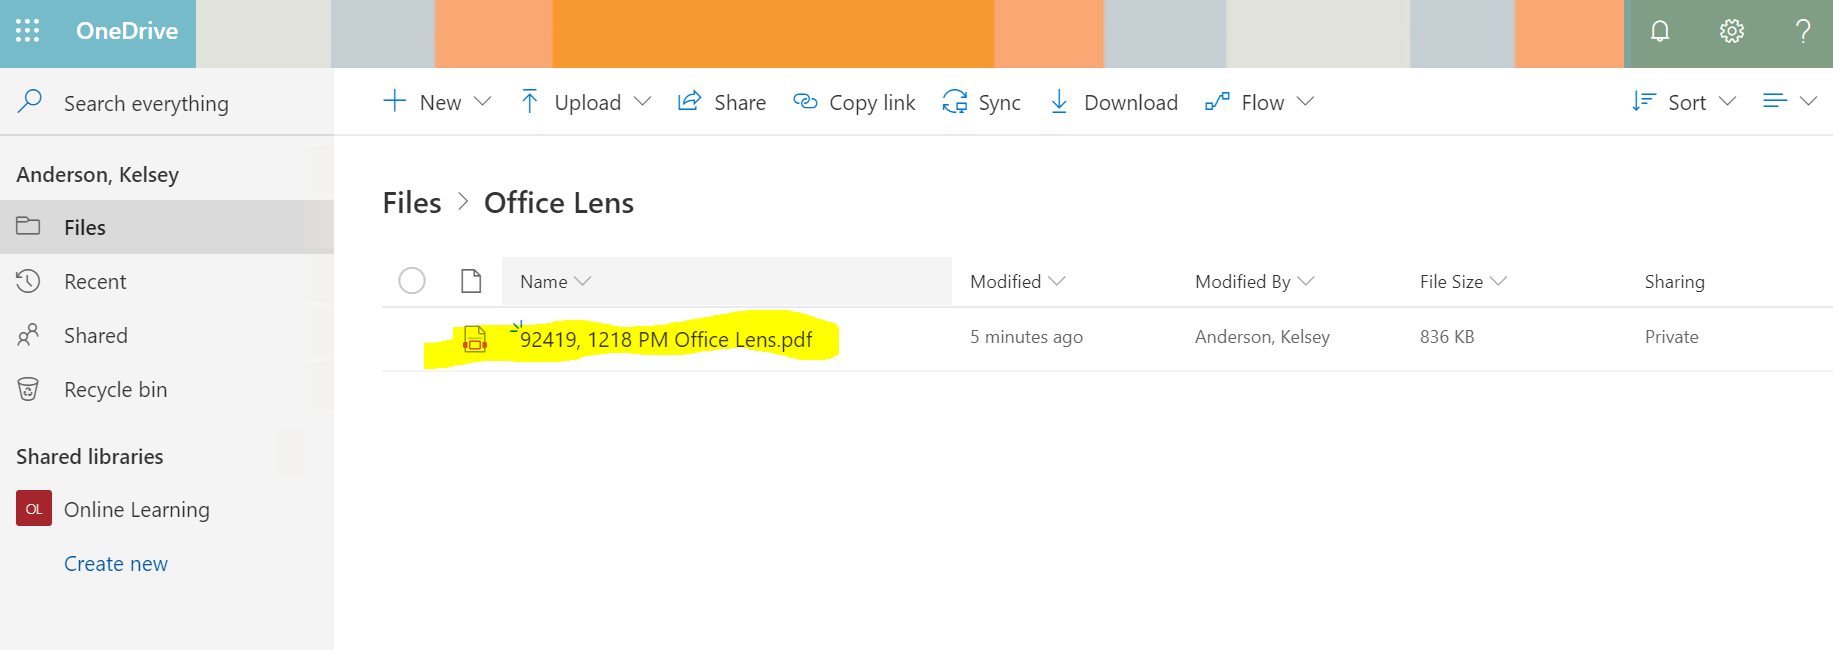
- Your file is now saved to your CVTC OneDrive account for easy access.
- Microsoft Lens will automatically create an Office Lens folder in your OneDrive. Open the Office Lens folder to find your files.


